Tuesday, May 24, 2011

Roasted Veggies w/ Brown Rice

Tonight's dinner was slightly chaotic. It really is a simple dinner to make but with all the chopping and a toddler throwing a tantrum, it took SOOO much longer to make than normal! Half the time I was making it, I had Trevor on my hip so my pictures didn't come out as well as I'd hoped. Aside from all that, it's one of my favorites and it's completely vegetarian. You could add some tofu or toss some chicken in later if you wanted to.

I love the fact that almost every vegetable I used was grown organically right here in Ramona. I"ll blog about all the great farm stands here another time. With the exception of the potatoes and broccoli, everything else was either from San Diego Organic Farms or Connelly Farms. It's amazing how much better everything tastes when it's fresh!

Ok, normally I would soak the rice prior to making this but my planning skills haven't been what they normally are. We are doing a complete exterior remodel on our house right now and I had carpenters here at 645am this morning! Fortunately brown rice doesn't have as much phytic acid as other grains do so I usually don't have trouble eating it. Here are the instructions for soaking if you were to do that.

Combine the amount of rice you want with the normal amount of water (usually 1cup of brown rice per 2 cups of water) and add 1-2 tablespoons of acid medium. I usually use cultured buttermilk, lemon juice, or apple cider vinegar. Soak for 7hrs at room temperature. After soaking just bring to boil, reduce heat, cover and simmer for about 45 minutes.

A blog that I LOVE is http://www.passionatehomemaking.com/ and she has a wonderful post about why soaking grains is beneficial and instructions for each type.

With all that said, here is the recipe!

Roasted Veggies w/ Brown Rice


1 cup brown rice
2 cups water
4 cups chopped veggies (I used beets, potatoes, broccoli, onions, carrots, zuchinni, & yellow squash)
2 garlic cloves, crushed
1/2 cup white balsamic vinegar (regular would work too)
1/4 cup olive oil
1 tablespoon dried basil
salt and pepper to taste

Directions:

1. Soak rice for 7hrs as directed above.
2. Preheat oven to 375.
3. Chopped all veggies and toss into a large bowl. Crush your garlic and mix with veggies.


4. Add your balsamic vinegar and olive oil and mix until everything is coated.
5. Arrange veggies in a deep baking dish in a single layer. (I like to lay down some parchment paper first to make clean up much easier)

6. Sprinkle with basil, salt and pepper and stir around until coated.


7. Roast at 375 for 1 hr.
8. Cook rice according to package instructions.


9. Arrange veggies on top of rice and serve!

Monday, May 23, 2011

Mineral Makeup!


I wasn't sure what I was going to post about today but as I was getting ready this morning I realized how much I love my makeup and thought I would share. Don't hate me, but I've never been someone who has really struggled with acne. I always got a few breakouts around "that time of the month" but nothing too bad. I had used MAC makeup for years and loved it! In my transition to healthier products I became more aware of how much stuff we put on our skin, and how our skin absorbs it into our bloodstream. How many medicines do you know of that are applied topically but affect things under the skin? I can think of plenty!

I will still admit that I use one thing (that I will explain later) from MAC because I haven't yet found something better, but I haven't given up my search yet. My sister in law started looking for a mineral makeup at the same time that a friend of mine tried out Bare Essentials. I got my husband to watch our son, who was only about 9 months at the time and hit the mall with my friend. I tried Bare Minerals foundation and it felt like I wasn't wearing anything... in a good way. I still had the coverage, but it just felt like there wasn't anything there. I got a starter kit and tried it out. It took some getting used to because it's a 3 step process for the foundation. You put on the color, add your blush, and then a finishing powder to diffuse the blush and set everything.


I liked the results but did a search on the skin deep website and found out that Bare Essentials foundation still wasn't great for your skin. I did a search on that website for a mineral makeup that was a 0-2 (the lower the number the better it is) and found a company called EcoGlo Minerals. I ordered a sample foundation kit to figure out what color I was and then started ordering stuff as I ran out of the original starter kit I had bought from Bare Essentials.

I was so impressed with the quality of the foundation and the price! The makeup stays on all day and feels so light on. I can't even remember the last time I had a breakout! I used to have to use an exfoliating scrub once a week and now I rarely ever use anything! My face is softer, and healthier than it's ever been. Never, ever will I switch back to anything else.
Definitely wasn't planning a photo shoot today but at least you can see how light it looks.
I decided to try out some eyeshadow next, so I ordered a few sample jars. I LOVE the fact that you can order a sample size of everything. You can also order refill baggies and just refill the jars you already have. Less trash and less money! Anyway, I ordered some neutral colors as bases and a deep purple and chocolate for crease colors. One of the colors didn't match my skin tone very well, but all of the others I love and swap out all the time.

Ok, so here's the kicker..... the one thing that I still use from MAC. Concealer. It's not because the mineral foundation doesn't cover enough, because it does. It's because I love when eyeshadow pops and doesn't crease on your eyelids. When I put the concealer on, it allows the color to show up much better and I have no creases during the day. If I don't use it, the color doesn't show as much and I have creases. I still don't know how to fix it... I've even tried putting foundation on my eyes before eyeshadow but that doesn't help either. I just recently tried the yellow color corrector from EcoGlo but that didn't help either. It did help offset my dark circles though. Those are from my 16 month old son who didn't sleep for the first year of life! :) I still have yet to try the wet application method. I'll have to take some before and after pictures of that.

It is such a wonderful feeling to know that my makeup has actually made my skin healthier over time and isn't putting harmful chemicals into my body. EcoGlo Minerals isn't a big company either. She's a work at home mom and I love knowing that I'm supporting another mom out there like me. Thanks for the great products and keep up the good work!

Friday, May 20, 2011

The Maker's Diet and Raw Milk

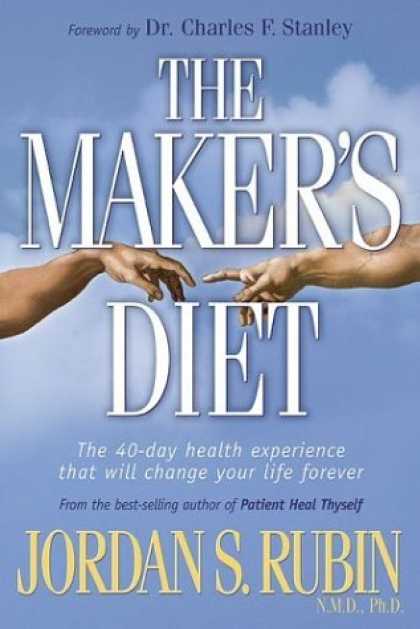
I never thought I would be one of those "healthy weird people" even 3 years ago. I still don't consider myself to be weird, but who thinks that they are weird, right? I always thought that life was too short to freak out over every chemical, preservative, etc. But a few years ago, when I couldn't get pregnant my whole thought process changed. I went through fertility treatments that were so hard on my body that I looked like I was 4 months pregnant! I fortunately was able to get pregnant, but once that happened I didn't want anything to hurt this precious life growing inside me. I had been through too much to lose him now. A friend of mine lent me a book about "the organic pregnancy". I wish I could remember the name of it but it has totally slipped my mind. It had all kinds of great information about cleaning products, and eating healthy. The changes gradually happened from then on. I'd always thought of myself as a healthy person with a strong immune system, but I found out real quick once I had my son that I wasn't as healthy as I thought I was. I desperately tried every prescription possible to get rid of an illness I was struggling with without any luck. That's when I turned to a book called "The Maker's Diet" by Jordan Rubin. What an eye opener! I never knew about soaking grains, drinking raw milk, and how important probiotics are. There is so much more than just that, but the idea of going back to what God had originally taught his people to eat made perfect sense to me. He is the all-knowing God of the universe, so why not turn to him for health?

I made simple changes at first, soaking grains, drinking raw milk, and taking probiotics. The results were amazing! What all the prescriptions couldn't do for me, diet did.  I haven't stepped into the realm of lactofermentation yet, but I'll get there.

I'll get into why soaking grains is important later, but I'm sure some of you are wondering what "raw milk" is. Raw milk, is milk that has not been pasteurized. It is full fat, cream top, full of beneficial bacteria and enzymes. In fact most people with milk intolerance can drink raw milk with no problems because the enzymes that help you digest milk are not destroyed in the pasteurization process.  I was scared to try it at first because I thought it was going to be thick and strong tasting. I was very surprised! I could hardly tell much of a difference between the raw milk and the 2% I was used to drinking. The one problem I had was trying to find raw milk for a good price. Paying $7.25 per half gallon was just not an option for me! I made a few phone calls and was able to find someone locally that was willing to sell it to me for "animal use only" for MUCH cheaper, let's say 4x less than what I could buy it at the store for. The only reason it's labeled as animal use, is because there are certain regulations that prevent dairies from selling unpasteurized milk. Yes, I have to drive 25 minutes each way to get it about once a week, but it is well worth the time and extra effort. I have never had cleaner, more fresh milk than I do. In fact, my 16 month old refuses to drink anything but raw milk. Once you try the real stuff, the milk at the store actually tastes old and kind of gross! A great website to check out is www.realmilk.com. They even have resources on where to find it.

I would love to hear your thoughts on raw milk, and what healthy changes you've made recently.

Thursday, May 19, 2011

Chocolate Peanut Butter Protein Cookies

Welcome to my blog! I love to make things at home that most people would buy in the store and since protein bars are so expensive, I thought I would try out a recipe. I wish I could call this one my own, but it was given to me by a friend. You know who you are! Thank you! Next time I am going to try soaking the oats before baking.


Chocolate Peanut Butter Protein Cookies

1 Serving = 1 Cookie: 106 calories, 4g fat, 13g carbs, 4g protein

Ingredients:
1 cup rolled oats
1-1/2 bananas, mashed
1/4 cup natural peanut or almond butter
1 teaspoon baking powder
4 tablespoons of protein powder of choice (I used organic vanilla hemp protein powder)
1/4 cup unsweetened cocoa powder
4 tablespoons sucanat (I didn't have any on hand so I substituted brown sugar)
1/2 cup almond milk (Regular milk would be fine too)


1. Preheat oven to 350.

2. Mash bananas.


3. Place all ingredients into a large bowl and mix until combined.


 4. Scoop batter by heaping tablespoons onto  a cookie sheet.


5. Bake for 9-12 minutes until cookies are firm. Makes 12 cookies.

(I only made 11 because I made one too big! Ooops!)
Thanks for checking out my blog. I plan to post a variety of recipes for food and other household things like cleaning and beauty products. I would love any comments or input!